In my previous post about the project, the stem pieces and manboards had been installed in the canoe. Since that time the ribs for the canoe were bent into shape and temporarily attached to the canoe - I am not sure if steam or hot water was used to make the ribs pliable. The canoe had to be weighted down and clamped heavily while the ribs dried into shape otherwise the outward pressure of the ribs trying to return to a straight form could destroy the canoe. These ribs needed several days to dry so the canoe was left over the weekend.
 |
| The ribs nailed in place temporarily |
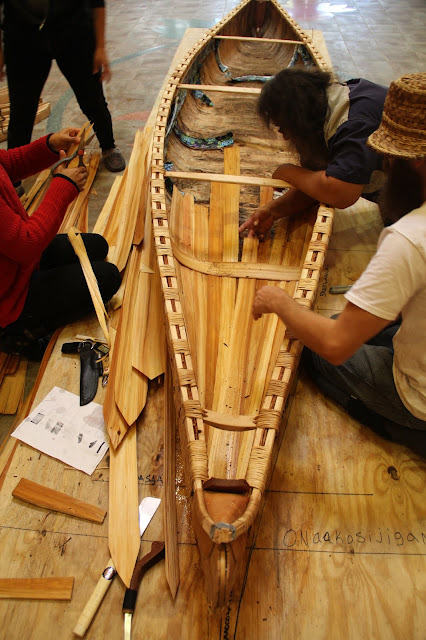
Once the ribs had dried into their bent shapes, they could be removed and the final steps of the assembly could begin. At this stage thin sheathing made from cedar was cut to length and fitted into the canoe. This sheathing adds strength to the canoe (so you won't put a foot through the bottom of the canoe) without adding much weight. Once the sheathing strips were wedged in place with a temporary rib, the real ribs were cut to length, their ends trimmed and the leading edge rounded to fit into the canoe. The ribs were installed by inserting the ends under the gunnel and then tapped into place with a mallet. The entire hull was soaked with hot water to make the bark more flexible and capable of stretching as the ribs were forced into place. More water was added as needed. This process was completed over the course of two days. At this point the final stitching of the hull on the bow and stern of the canoe was also completed.
 |
| One half of the completed ribs |
 |
| Drenching the hull in boiling water to make it more pliable |
 |
| Carving a rib to its final shape - also note the completed stitching on the hull |
 |
| Adding the cedar sheathing |
 |
| Installing the very first rib |
 |
| The ribs are tapped into place with a mallet |
 |
| A view of the installed ribs and sheathing |
 |
| The pieces of sheathing overlap on edge and end-to-end in two places either side the center of the canoe |
 |
| The completed ribs |
 |
| Notice how the ribs and sheathing of the ceiling mimic the ribs and sheathing in the canoe |
 |
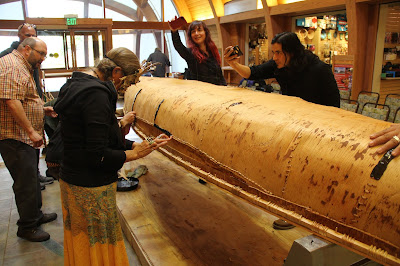
| Today I noticed for the first time that the 15 foot long hull is made of only two large pieces of bark- one more then 10 feet long and the other making up the difference of the 15 feet. |
First the gunwale caps needed to be carved and fixed in place. These were fixed in place with hand-carved hardwood pegs. (A peg that I carved was the last one installed). On the bos and stern, the gunwale caps were stitched into place as there is no place to insert a peg.
 |
| Carving the gunwale caps with a draw knife |
 |
| Hot water allows the gunwale caps to bend into the proper shape. |
 |
| Fixing the gunwale cap to the gunwales with hardwood pegs |
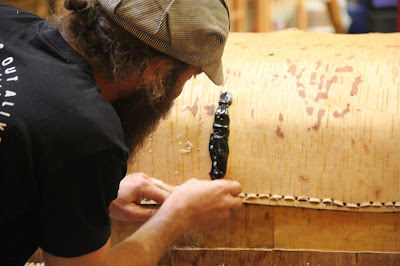
Finally the seams of the canoe needed to be sealed with a mixture of spruce or pine pitch, charcoal, and bear grease. The pitch is heated until all the volatile turpentine has evaporated from it then bear grease and charcoal are added until it has the right consistency to be works by hand onto the seams of the canoe. This process will go on until tomorrow in several stages. The pitch must be applied and then reheated to mold it into place.
 |
| A large milling stone was used to grind charcoal |
 |
| Adding bear grease to the hot pitch |
 |
| Testing for consistency |
 |
| Stirring in charcoal |
 |
| Demonstrating how to apply the hot pitch by hand - the key is to wet the hands with soapy water so the pitch doesn't stick |
 |
| Many hand make light work |
 |
| This pitch will be reheated and smoothed further |
Once the canoe is entirely complete the Tribe plans to have a launch ceremony. This is tentatively schedule for Saturday November 10th. I will post more information as it become available.


